#ifndef USE_VTK
#include <iostream>
{
std::cout << "This sample requires direct compilation with VTK. Stop" << std::endl;
return 0;
}
#else
#include <opencv2/viz.hpp>
#include <opencv2/viz/widget_accessor.hpp>
#include <iostream>
#include < vtkPoints.h>
#include < vtkTriangle.h>
#include < vtkCellArray.h>
#include < vtkPolyData.h>
#include < vtkPolyDataMapper.h>
#include < vtkIdList.h>
#include < vtkActor.h>
#include < vtkProp.h>
static void help()
{
cout
<< "--------------------------------------------------------------------------" << endl
<< "This program shows how to create a custom widget. You can create your own "
<< "widgets by extending Widget2D/Widget3D, and with the help of WidgetAccessor." << endl
<< "Usage:" << endl
<< "./creating_widgets" << endl
<< endl;
}
{
public:
};
{
vtkSmartPointer<vtkPoints> points = vtkSmartPointer<vtkPoints>::New();
points->InsertNextPoint(pt1.
x, pt1.
y, pt1.
z);
points->InsertNextPoint(pt2.
x, pt2.
y, pt2.
z);
points->InsertNextPoint(pt3.
x, pt3.
y, pt3.
z);
vtkSmartPointer<vtkTriangle> triangle = vtkSmartPointer<vtkTriangle>::New();
triangle->GetPointIds()->SetId(0,0);
triangle->GetPointIds()->SetId(1,1);
triangle->GetPointIds()->SetId(2,2);
vtkSmartPointer<vtkCellArray> cells = vtkSmartPointer<vtkCellArray>::New();
cells->InsertNextCell(triangle);
vtkSmartPointer polyData = vtkSmartPointer::New();
polyData->SetPoints(points);
polyData->SetPolys(cells);
vtkSmartPointer mapper = vtkSmartPointer::New();
#if VTK_MAJOR_VERSION <= 5
mapper->SetInput(polyData);
#else
mapper->SetInputData(polyData);
#endif
vtkSmartPointer actor = vtkSmartPointer::New();
actor->SetMapper(mapper);
viz::WidgetAccessor::setProp(*this, actor);
setColor(color);
}
{
help();
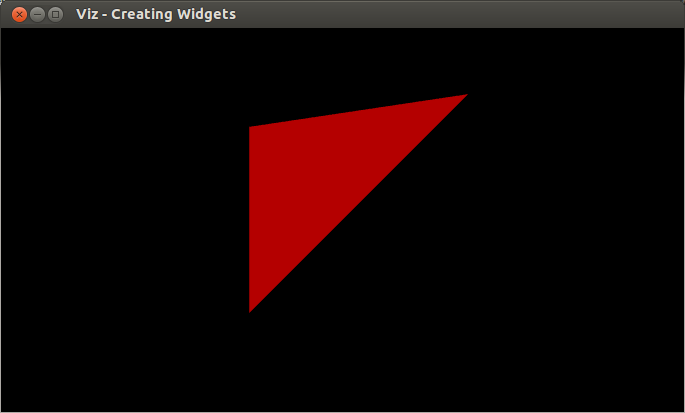
WTriangle tw(Point3f(0.0,0.0,0.0), Point3f(1.0,1.0,1.0), Point3f(0.0,1.0,0.0), viz::Color::red());
myWindow.showWidget("TRIANGLE", tw);
myWindow.spin();
return 0;
}
#endif
通过其坐标 x, y 和 z 指定的 3D 点的模板类。
定义 types.hpp:255
_Tp z
3D 点的 z 坐标
定义 types.hpp:286
_Tp x
3D 点的 x 坐标
定义 types.hpp:284
_Tp y
3D 点的 y 坐标
定义 types.hpp:285
此类表示按 BGR 顺序的颜色。
定义 types.hpp:64
Viz3d 类表示一个 3D 视觉化窗口。此类是隐式共享的。
定义 viz3d.hpp:68
int main(int argc, char *argv[])
定义 highgui_qt.cpp:3
与磁盘上文件关联的文件存储的“黑盒”表示。
定义 core.hpp:102


 1.9.8
1.9.8